How to add Google Analytics to WordPress : Step-by-Step Guide for Beginners

I surmise all of you must have heard about the WordPress Google Analytics. However, most of you all may not know how to add Google Analytics to WordPress. In fact, some of you may even be unaware of the importance of Google analytics.
It is pretty obvious that we do not create a website “JUST”. Nor do we write blog posts just to publish it in a website. Right? We put in all our time and effort to come up with an outstanding website and blogs to get more views. And more subscribers as far as possible. Hence, it is equally important to understand how your audience interacts with your website for its success.
For this purpose, in this article, I will show you how to add Google Analytics to WordPress.
Let me start the article with:
“What is WordPress Google Analytics?”
Google Analytics is one of the powerful tools to monitor your website and to analyze the site’s traffic. WordPress Google Analytics allows you to keep the track record of website traffic. Also, it helps you analyze them accurately. Consequently, helping you in making data-driven, rational decisions.
Google Analytics provides you with the complete statistics about who visits your website and when and how do they visit. Moreover, it also provides you with the information like what visitors do once they are on your website and how long do they stay there.
With Google Analytics WordPress, it is more than tracking the number of visitors to your site or blogs. The statistics that WordPress Google analytics provide are actually the key elements for the growth of your website. For me, Google analytics is a must-have if you want a steady and speedy growth for your website.
To add Google Analytics to WordPress, you need to have a Google Analytics account. You already have an account? Great. If not I’ll show you how to create one 🙂
If you looking for a more detailed instruction then continue reading the article.
Step 1: Sign up for Google Analytics account
Simply, visit the Google analytics signup page and create your account.

If you already have a Gmail or a Google account you can use them to sign-in.
When you click on the “Sign up” button, you will be redirected to the page where you will be provided with two options. As shown on the screen below, you have to choose between a website and mobile app. After that, you are required to fill in all the fields in the form. You need to enter the account name, Website name, website’s URL, country and the time zone.

Click here to create a Google Analytics account right away.
Step 2: Get the tracking ID
Once you fill in all the required information, click on the “Get Tracking ID” button.
![]()
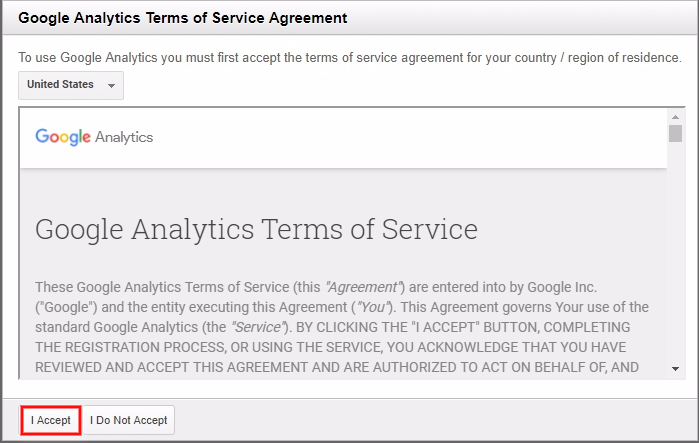
Then, it will present you the Google Analytics terms of service. Click on “I Accept “button.
You will then be prompted over to the page which will provide you your tracking ID.
![]()
That’s it. We are done with creating a Google Analytics account.
Now, that we have set up an account, let me show you how to add Google Analytics in WordPress.
Basically, there are two ways to add Google Analytics to WordPress. One is using a plugin and the other is without a plugin. Undoubtedly, the easiest and better among them is to add it with a plugin due to various factors. However, if you are familiar with coding then, you can go with the second option. That is to add a Google analytics without a plugin.
First, let me show you all how to install Google Analytics to WordPress with Plugin
Google Analytics WordPress Plugin by MonsterInsights
Presently, there are a large number of Google analytic plugins available. However, I strongly recommend Google Analytics by MonsterInsights.
MonsterInsights is the most popular Google Analytics which was formerly owned by Yoast. This plugin helps you understand your universal audience by providing you all the demographics, track records and interest reports. It is simple to setup yet very powerful.
Trusted by over 1 million websites, this plugin has been the simplest way to add Google Analytics to WordPress by far. Since it a freemium tool, you can use either free or the premium version as per your convenience.
Now, let’s get to it.
The very first thing, you need to do is install the MonsterInsight plugin and then activate it. You may also check out our step by step guide on how to install a WordPress plugin.
Once the plugin is activated, you will see a new menu “Insights” added to your admin menu.

Then, go to Insights » Settings so as to configure the plugin settings.
As indicated in the image below, click on “Authenticate with your Google account” button to connect your WordPress website with Google Analytics.

Then, you will see a popup where you need to authenticate your Google account.
Click on “Next” button to continue.

Yet another popup will appear where you need to click on “Click to get Google code” button and then “Next“ button.

Again, a box will popup with a message that reads “MonsterInsights would like to view and manage your Google Analytics data”.
Click on “Allow” button which will be followed by an authentication popup.

Now, you will be provided with a line of code. Just copy the code.

And next thing you need to do is just paste the code in the MonsterInsights popup.
Click “Next” to continue.

Finally, select the profile you want to track and click on the next button. And we are done.

Note: Google Analytics takes some time (generally 24 hours) before showing the stats of your website.
How to add Google Analytics to WordPress Without Plugin
Definitely, it is a plus point if you are familiar with coding. But that does not mean you have to be a coding master. Here are some simple steps that will show you how to add Google Analytics to WordPress.
So, let’s get started.
Step 1: Get your tracking Code
Firstly, login to your Google Analytics account and then select the website for which you need the tracking code.
Then, click on “Admin” that resides on the left side of the taskbar as shown below.

Under the property column, you will see a menu “Tracking Info”. Click on it and then click on “Tracking Code”.
![]()
Right under the Website tracking section, you will get the tracking code of your website. Just copy the code.
![]()
Step 2: Add the tracking code to the header.php file
Log in to your WordPress dashboard and then go to Appearance » Editor.

Then, click on header.php file under the templates section.

Now, paste the code that you copied in step 1 after the <body> tag as shown in the screen below.

Finally, click on “Update File” button. And that’s it.

Wrapping It Up!
Hopefully, this article helped you learn how to add Google Analytics to WordPress. Like I mentioned earlier, Google analytics is a must-have if you want a steady and speedy growth for your website. Not to mention, Google Analytics WordPress is by far the most powerful tool to improve your site’s performance on a constant basis.
Which method you think was easier to add Google Analytics to your website? Don’t forget to let us know about your experience in the comments below J


